My older, web-savvy brother, Chandler, loves me very much. For Christmas, he gave me a card that simply said "deeprootsfood.com" – I visited the url and found this new website! Best. Christmas. Ever.
So, it's official. This is the year that I will invest some real blood, sweat and tears into this blog (and not into my dishes, hopefully!). I think you guys will find all my new recipes delicious because they will definitely be nutritious!
Head on over to the new site (here) and check it out! If you've subscribed here, then click here to subscribe to the new blog! : )
Much love & Merry Christmas!
- Anne (plus Chandler & Lauren)

Saturday, December 28, 2013
Saturday, December 21, 2013
Christmas Squash
I had a fun conversation recently where I was asked, "If you could make any dish right now, what would it be?" Well, oddly enough the original answer wasn't this recipe but it did include many of the same ingredients. The more I thought about my response the more it evolved. It went from a salad with most of my favorite Autumn ingredients to a warm, Christmas inspired stuffed squash. As I turned this recipe over in my head I realized I was asking for perfection - a dish that had beautiful colors (Christmas no less!), contrasting textures and flavors that complimented each other. Could this be done?? My friends, it can! This squash was fantastic! It was unbelievably easy and oh so tasty. Healthy too?? This recipe is just hitting the nail on every head. (ha!)

So if you're debating what to make for Christmas, look no further. If you just need another weeknight dinner, again, look no further! This dish is easy enough for a weeknight meal but tasty and beautiful enough for a Christmas Dinner. I only wish I had the beautiful photographs to prove it. Sadly, when you mix an inexperienced photographer, time crunch and barely any light (thanks, Winter) you don't get the stunning picture that you want. However, I will try my best to persuade you to make this dish with my words. (Ha!)
I chose the Acorn squash as it's skin is a bit easier to cut through and roasts fairly quick. The flesh is already a beautiful gold, but the color deepens as it cooks. Not to mention it the texture turns as silky as butter! I roasted it with some ghee in my cast iron pan and it formed a crust on top of the flesh and made the house smell amazing! It couldn't have been easier. For real you guys... this squash might become my favorite!
As for the "stuffing" I really just wanted to use a few specific ingredients (cause I was craving them!) and so I rounded out the colors and textures from there. There is only one thing I would tweak and I'm not sure if I would necessarily like it better... but I'll get to that.* For now, my key ingredients were pomegranate seeds, sheep's milk feta and toasted hazelnuts.
Are you sold yet??? You should be! But ok, I'll keep going just incase...
I wanted the tart flavor of the pom seeds, the tangy, salty bite of the feta and the warm roasty (a word?) flavor of the hazelnut. But I needed a filler and something to brighten it up. Enter quinoa and fresh parsley! To top it off I added a few squeezes of lemon and a drizzle of olive oil. Stuff all that in a buttery squash? The flavors worked perfectly together! With every bite you had buttery, roasty, tangy, salty, tart and fresh. In every bite?? Dang.
As if this dish could get more diverse, let's talk about the textures too. The squash is undeniably creamy while the hazelnuts provide good crunch. The quinoa is soft and a just a tiny bit chewy while the pom seeds are so complex with an initial crunch, a burst of juice and then finished up with a chewy texture. (I love pom seeds for this reason!) The sheep's milk feta is soft and crumbly. The fresh herbs are chopped more roughly so that you when you chew them, you're breaking up the leaves and thus releasing plenty of fresh flavor right there on the spot! If you ever eat roughly chopped herbs, you might know there's a specific texture they have -- similar to greens but more delicate. And to finish up, the lemon and oil bring some moisture and bind it all together.
Well folks, there you have it. My attempt to persuade you to make this dish. This squash had it all to me -- I just loved it. It couldn't have been easier to make, more delicious to eat and prettier to display. Whether you make this for a special dinner or just a weeknight where you only have 30 minutes, you should try this! I know I will be making it again and again.
I may not be a writer or photographer but I do love food. I love creating it, sharing it, discussing it... basically all things food. It's one of those parts of creation that never ceases to amaze me. You can see an inkling of God's creativity with every aspect of food -- all the way from farm to table. I hope you have as much fun as I did with this recipe!

Christmas Squash
Serves 2, with extra stuffing
1 Acorn Squash
1/2 heaping cup Quinoa*
1/2 cup Pomegranate seeds
1/2 cup Sheep's Milk Feta**
1/4- 1/2 cup Hazelnuts, toasted
1/2 cup Fresh Flat Leaf Parsley, roughly chopped
1 large lemon
Olive Oil
Knob of Ghee, Coconut Oil or Butter
1. Preheat oven to 350.
2. Throw your knob of ghee (or other fat) in a cast iron pan & place in the oven to melt as it heats up.
3. Cut the Acorn Squash in half and scoop out seeds. Place squash cut side down in pan and put back in the oven to roast for 20-30 minutes or until fork tender (you want it to be very fork tender so that it's super creamy!)
4. Cook quinoa per the instructions on the box or bag. This should take about 10-20 minutes.
5. Place hazelnuts on a pan and roast in the oven with squash for 6-8 minutes or until well toasted.
6. Cut your pomegranate in half and begin to release the seeds. Wear an apron! :)
7. Roughly chop parsley.
8. Roughly chop feta.
To Assemble:
1. Mix quinoa, nuts, feta, parsley and pom seeds in a bowl. Squeeze lemon & drizzle olive oil to taste.
2. When the Squash is ready flip it over onto your place, face side up. Sprinkle with coarse salt and stuff the cavity with lots of goodness! I like to add a little more stuff on the side of the plate as I wanted more than the cavity could hold.
3. Feel free to sprinkle a bit more herbs or nuts on the top when finished.
Anne
*If you made it this far then you'll remember I said there was one thing I would tweak. In my pictures I used tri-colored quinoa. Originally I wanted to use all black quinoa for color's sake. I'm not sure if it would be too dark and you'd loose the pom seeds and parsley or if it would make the colors pop even more. Next time I'll try it, but if you beat me there let me know what you think!
**I specify Sheep's Milk Feta for a reason. Sheep's milk is tangier and tastes light years different than cow's milk feta. It really makes a huge difference to use that instead of your Athena Brand pre-crumbled feta, so if you can use the sheep! :)
As always, this recipe is totally adjustable. I prefer equal parts of goodies to quinoa ratio but if you prefer any one item more, adjust the amounts the way you want! That's the fun of cooking -- tweaking to fit your preferences.

So if you're debating what to make for Christmas, look no further. If you just need another weeknight dinner, again, look no further! This dish is easy enough for a weeknight meal but tasty and beautiful enough for a Christmas Dinner. I only wish I had the beautiful photographs to prove it. Sadly, when you mix an inexperienced photographer, time crunch and barely any light (thanks, Winter) you don't get the stunning picture that you want. However, I will try my best to persuade you to make this dish with my words. (Ha!)
I chose the Acorn squash as it's skin is a bit easier to cut through and roasts fairly quick. The flesh is already a beautiful gold, but the color deepens as it cooks. Not to mention it the texture turns as silky as butter! I roasted it with some ghee in my cast iron pan and it formed a crust on top of the flesh and made the house smell amazing! It couldn't have been easier. For real you guys... this squash might become my favorite!
As for the "stuffing" I really just wanted to use a few specific ingredients (cause I was craving them!) and so I rounded out the colors and textures from there. There is only one thing I would tweak and I'm not sure if I would necessarily like it better... but I'll get to that.* For now, my key ingredients were pomegranate seeds, sheep's milk feta and toasted hazelnuts.
Are you sold yet??? You should be! But ok, I'll keep going just incase...
I wanted the tart flavor of the pom seeds, the tangy, salty bite of the feta and the warm roasty (a word?) flavor of the hazelnut. But I needed a filler and something to brighten it up. Enter quinoa and fresh parsley! To top it off I added a few squeezes of lemon and a drizzle of olive oil. Stuff all that in a buttery squash? The flavors worked perfectly together! With every bite you had buttery, roasty, tangy, salty, tart and fresh. In every bite?? Dang.
As if this dish could get more diverse, let's talk about the textures too. The squash is undeniably creamy while the hazelnuts provide good crunch. The quinoa is soft and a just a tiny bit chewy while the pom seeds are so complex with an initial crunch, a burst of juice and then finished up with a chewy texture. (I love pom seeds for this reason!) The sheep's milk feta is soft and crumbly. The fresh herbs are chopped more roughly so that you when you chew them, you're breaking up the leaves and thus releasing plenty of fresh flavor right there on the spot! If you ever eat roughly chopped herbs, you might know there's a specific texture they have -- similar to greens but more delicate. And to finish up, the lemon and oil bring some moisture and bind it all together.
Well folks, there you have it. My attempt to persuade you to make this dish. This squash had it all to me -- I just loved it. It couldn't have been easier to make, more delicious to eat and prettier to display. Whether you make this for a special dinner or just a weeknight where you only have 30 minutes, you should try this! I know I will be making it again and again.
I may not be a writer or photographer but I do love food. I love creating it, sharing it, discussing it... basically all things food. It's one of those parts of creation that never ceases to amaze me. You can see an inkling of God's creativity with every aspect of food -- all the way from farm to table. I hope you have as much fun as I did with this recipe!

Christmas Squash
Serves 2, with extra stuffing
1 Acorn Squash
1/2 heaping cup Quinoa*
1/2 cup Pomegranate seeds
1/2 cup Sheep's Milk Feta**
1/4- 1/2 cup Hazelnuts, toasted
1/2 cup Fresh Flat Leaf Parsley, roughly chopped
1 large lemon
Olive Oil
Knob of Ghee, Coconut Oil or Butter
1. Preheat oven to 350.
2. Throw your knob of ghee (or other fat) in a cast iron pan & place in the oven to melt as it heats up.
3. Cut the Acorn Squash in half and scoop out seeds. Place squash cut side down in pan and put back in the oven to roast for 20-30 minutes or until fork tender (you want it to be very fork tender so that it's super creamy!)
4. Cook quinoa per the instructions on the box or bag. This should take about 10-20 minutes.
5. Place hazelnuts on a pan and roast in the oven with squash for 6-8 minutes or until well toasted.
6. Cut your pomegranate in half and begin to release the seeds. Wear an apron! :)
7. Roughly chop parsley.
8. Roughly chop feta.
To Assemble:
1. Mix quinoa, nuts, feta, parsley and pom seeds in a bowl. Squeeze lemon & drizzle olive oil to taste.
2. When the Squash is ready flip it over onto your place, face side up. Sprinkle with coarse salt and stuff the cavity with lots of goodness! I like to add a little more stuff on the side of the plate as I wanted more than the cavity could hold.
3. Feel free to sprinkle a bit more herbs or nuts on the top when finished.
Merry Christmas!
I wish you more than seasons blessings this year. I wish you the Joy of our Savior! That you rejoice in Him and share His love and blessings with others!
Anne
*If you made it this far then you'll remember I said there was one thing I would tweak. In my pictures I used tri-colored quinoa. Originally I wanted to use all black quinoa for color's sake. I'm not sure if it would be too dark and you'd loose the pom seeds and parsley or if it would make the colors pop even more. Next time I'll try it, but if you beat me there let me know what you think!
**I specify Sheep's Milk Feta for a reason. Sheep's milk is tangier and tastes light years different than cow's milk feta. It really makes a huge difference to use that instead of your Athena Brand pre-crumbled feta, so if you can use the sheep! :)
As always, this recipe is totally adjustable. I prefer equal parts of goodies to quinoa ratio but if you prefer any one item more, adjust the amounts the way you want! That's the fun of cooking -- tweaking to fit your preferences.
Thursday, November 28, 2013
Giving Thanks....but not for this dish.
Happy Thanksgiving!

I hope everyone enjoyed time away from work, time with their friends and/or families and some delicious eats. I definitely did and am so thankful for it. As such, I was hoping to bring you a festive side dish to share not only at future thanksgivings, but for any Fall meal(!) ...but really what I have for you today is a disaster.
Yeah, that's right. I'm blogging about my food disaster. I was trying to come up with a lighter veggie centered dish that was not only beautiful for Fall but also more elegant than a salad. Ya know? I mean, it is Thanksgiving after all. And there is only so much room on our plates! So when push comes to shove, who is gonna pick a Plain Jane Salad over delicious dressing, turkey or sweet potato casserole?! Not me. (Except, I did pass on this dressing this year. I had a delicious & successful (albeit this dish) Dairy and Gluten Free (Duten Free as a good friend of mine calls it) Thanksgiving meal! Yahoo!)
Anyway, this disaster. A friend of mine brought her go-to vegan dish to our Thanksgiving meal at work this past week -- Roasted Butternut Squash and Broccoli. It was fantastic!!! It was the only item I ate seconds of. I even didn't finish a few things that were still delicious just so I could eat more of her dish! So naturally, I wanted to recreate it with whatever current obsession I had going on (aka Pomegranates). Poms are a winter fruit that I absolutely loooove! All I could think about was how gorgeous the colors would be if I threw some pom seeds in there with the squash and broccoli.
So I went for it. I roasted the butternut squash and the broccoli. But instead of using olive oil & garlic as my friend did, I went the sweeter route with coconut oil and maple syrup (just a hint). I chilled it and then sprinkled pom seeds all over the top and even threw some cooled, roasted butternut squash seeds on there too! I had it covered. I really thought I had nailed it on this one! ....Until I tasted it.
The broccoli didn't quite crisp up but it wasn't tender either. It was some weird texture in-between stale and chewy. GROSS! And there was missing something. Sure, I sprinkled some salt on there... but it really needed more than that. My dad later suggested rosemary which I totally agree with. The butternut squash was cooked well and tasted good as it almost always does... but there was some serious lacking going on in this dish. (Amidst the gross texture of the broccoli!).
Sad to say this dish was a total flop...but I did dedicate myself to it and got a few good shots! So I'm sharing them with you anyway. Hey, maybe you can recreate this dish WAY better than I can! I'm thinking next time, I will add in rosemary & thyme and use brussels sprouts instead of broccoli. Maybe then it'll be a success! If you try it, let me know. I haven't decided if I'm brave enough yet. Ha!
On the flip side, I am excited to say that I made maybe the best version of Sweet Potato Casserole yet -- all without any refined sugar, gluten or lactose. Plus it was all organic! Woooo! I'll have to share this one with you soon.
For now, enjoy these pics and the rest of your holiday. Many thanks to my sweet family who put up with me climbing all over the kitchen to get shots for a dish that wasn't even delicious. Maybe next time! : )
Happy Thanksgiving, failed dishes and all!
Anne


Sunday, November 17, 2013
Facts about Fat: Olive Oil
Hello there! Think I had forgotten about my Facts about Fats series? Think again!! I am here today with the simplest of recipes, albeit one that I always try to keep on hand. I use it on everything! From cooking at very low heats to drizzling over vegetables, potatoes or other grains to the oil base in salads! That's right. You guessed it -- EVOO! I absolutely love Extra Virgin Olive Oil. Sure, it's a pretty common household item, but there are a good number of facts that most people don't know (including myself).

First Fun Fact: (do you see what I did there? *nerd*)
First off, did you know that the burning point of Olive Oil is much lower than, say, Ghee or Coconut Oil? A burning point (as briefly discussed in this post) is the time at which the fat starts to smoke and let off gas. When this happens it releases free radicals which are extremely dangerous for your health and are linked to a variety of diseases. So when you are in the kitchen, you want to be aware of your temperature usage. It's good to have a general knowledge of what fats to use for specific cooking methods. For Olive Oil, since the burning/smoke point is much lower (around 200-300) it's really best to use it as a condiment moreso than as a cooking oil. Think: drizzling over food, salad dressings, etc.
Second Silly Statement: (ok this isn't silly but you see my trend)
I bet you're saying, "Ok, so I know what to use Olive Oil for....but what kind do I buy?" Well, I'll tell ya! You want to look for Organic, Cold (Expeller) Pressed, Unrefined, Extra Virgin Olive Oil. GEEEEEEZE, right?! ..But hear me out.
Organic: You want organic because otherwise olive trees can be loaded with chemicals! Try reading all of this information in one night!?! You'll be a committed organic buyer in no time. Chemicals are used to kill insects, fungus, weeds etc. We should be careful not to consume these just like we would avoid other various household items that are meant to kill insects, fungus, weeds etc as they are harmful and dangerous to the body. Strangely enough, we spray chemicals on our plants and think it's ok but we would never cook with it! I found myself thinking this way, but when I realized the basic connection I saw how illogical it was. I realize there is a higher threshold of toxicity there...but the toxicity is still there my friends. To me, buying organic is now one of the most basic and important steps in moving towards a healthier lifestyle. So, when people ask me how to get healthy that is always my first thought and I encourage them to research the harmful affects of chemicals (and hormones for that matter) on our bodies. Ignorance is bliss, right? Yeah, sadly that applies to our food nowadays! So research for yourself what really goes on with our food before it gets to our plates and see if it changes your mindset. Honestly, I encourage you to do this! : )
Expeller Pressed/Cold Pressed: Expeller pressed means that the oil is extracted mechanically. Often, chemicals are used to pull the oil out of the food. Again, this is harmful to the body because it not only deteriorates the extracted oil but the chemicals are of course not good for consumption. If you buy expeller pressed then you are using the mechanical (chemical free) method of extraction. The raw food item is pressed until the oil is released. It does not pull as much oil and is therefore a tad bit pricer, but it's better for the environment, for your health and for those working to extract the oil. Cold Pressed is also expeller pressed, but is more regulated on how high the temperature can go during the process. Friction can be created when the oil is being pressed resulting in higher temperatures. The higher the heat temp, the less nutrients remain intact. So, if possible you want Cold Pressed which is a heat regulated version of Expeller Pressed.
Unrefined: Refined olive oils are those that I mentioned above that use chemicals to extract them. This will cause the flavor to diminish, which is helpful if you need a neutral oil, but at the cost of adding chemicals into your body (although for other oils there are chemical free methods to obtain a neutral flavored, refined oil). So, for olive oil specifically you want unrefined. Usually Expeller /Cold Pressed olive oils are also unrefined but it's good to be aware and on the lookout. Sadly, at this point in the game you really have to dig for the most natural, wholesome ingredients as they aren't as readily available.
Extra Virgin: This refers to how many presses it took to release the oil. It's best to have it pressed only once because this retains the most flavor and is the highest quality.
I could keep going on and on about how to buy olive oil. I am learning that there is such an art to pressing olive oil and it makes me appreciate the hard work that it takes to do it honestly to preserve the flavors and nutrients! If you want to read more, check this out.
Third Tasty Thought: (ok I promise this is the last one...)
Now that you know what to use olive oil for and how to buy it, you should probably know how to store it. Fortunately, this step is much simpler than the other two. You don't want to heat it (per the First Fun Fact) so store it in a cool place. Also, Olive Oil is not like wine -- it does NOT get better with time. You want to buy as fresh as possible and use it up quickly. As such, avoid buying in bulk. Instead buy small, fresh quantities often.
These facts are all specific to Olive Oil. Terms vary per oils and even brands. Do some research of your own and learn all there is to know about oils and how to use them in the most nourishing and enjoyable ways!

This is one of my favorite ways to use olive oil. It's simple, delicious and goes with everything!
Rosemary Olive Oil
Olive Oil
Several Rosemary Sprigs
Glass jar with stopper or lid
I love to drizzle this on popcorn, vegetables, grains, potatoes... just about everything!! It's delicious!
xoxo,
Anne

Sources:
1. http://www.whfoods.com/genpage.php?tname=george&dbid=56
2. http://www.oliveoilsource.com/page/pest-weed-and-disease-control
3. http://www.lewisnaturalhealth.com/articles/general-articles/confused-about-cooking-oils-part-2

First Fun Fact: (do you see what I did there? *nerd*)
First off, did you know that the burning point of Olive Oil is much lower than, say, Ghee or Coconut Oil? A burning point (as briefly discussed in this post) is the time at which the fat starts to smoke and let off gas. When this happens it releases free radicals which are extremely dangerous for your health and are linked to a variety of diseases. So when you are in the kitchen, you want to be aware of your temperature usage. It's good to have a general knowledge of what fats to use for specific cooking methods. For Olive Oil, since the burning/smoke point is much lower (around 200-300) it's really best to use it as a condiment moreso than as a cooking oil. Think: drizzling over food, salad dressings, etc.
Second Silly Statement: (ok this isn't silly but you see my trend)
I bet you're saying, "Ok, so I know what to use Olive Oil for....but what kind do I buy?" Well, I'll tell ya! You want to look for Organic, Cold (Expeller) Pressed, Unrefined, Extra Virgin Olive Oil. GEEEEEEZE, right?! ..But hear me out.
Organic: You want organic because otherwise olive trees can be loaded with chemicals! Try reading all of this information in one night!?! You'll be a committed organic buyer in no time. Chemicals are used to kill insects, fungus, weeds etc. We should be careful not to consume these just like we would avoid other various household items that are meant to kill insects, fungus, weeds etc as they are harmful and dangerous to the body. Strangely enough, we spray chemicals on our plants and think it's ok but we would never cook with it! I found myself thinking this way, but when I realized the basic connection I saw how illogical it was. I realize there is a higher threshold of toxicity there...but the toxicity is still there my friends. To me, buying organic is now one of the most basic and important steps in moving towards a healthier lifestyle. So, when people ask me how to get healthy that is always my first thought and I encourage them to research the harmful affects of chemicals (and hormones for that matter) on our bodies. Ignorance is bliss, right? Yeah, sadly that applies to our food nowadays! So research for yourself what really goes on with our food before it gets to our plates and see if it changes your mindset. Honestly, I encourage you to do this! : )
Expeller Pressed/Cold Pressed: Expeller pressed means that the oil is extracted mechanically. Often, chemicals are used to pull the oil out of the food. Again, this is harmful to the body because it not only deteriorates the extracted oil but the chemicals are of course not good for consumption. If you buy expeller pressed then you are using the mechanical (chemical free) method of extraction. The raw food item is pressed until the oil is released. It does not pull as much oil and is therefore a tad bit pricer, but it's better for the environment, for your health and for those working to extract the oil. Cold Pressed is also expeller pressed, but is more regulated on how high the temperature can go during the process. Friction can be created when the oil is being pressed resulting in higher temperatures. The higher the heat temp, the less nutrients remain intact. So, if possible you want Cold Pressed which is a heat regulated version of Expeller Pressed.
Unrefined: Refined olive oils are those that I mentioned above that use chemicals to extract them. This will cause the flavor to diminish, which is helpful if you need a neutral oil, but at the cost of adding chemicals into your body (although for other oils there are chemical free methods to obtain a neutral flavored, refined oil). So, for olive oil specifically you want unrefined. Usually Expeller /Cold Pressed olive oils are also unrefined but it's good to be aware and on the lookout. Sadly, at this point in the game you really have to dig for the most natural, wholesome ingredients as they aren't as readily available.
Extra Virgin: This refers to how many presses it took to release the oil. It's best to have it pressed only once because this retains the most flavor and is the highest quality.
I could keep going on and on about how to buy olive oil. I am learning that there is such an art to pressing olive oil and it makes me appreciate the hard work that it takes to do it honestly to preserve the flavors and nutrients! If you want to read more, check this out.
Third Tasty Thought: (ok I promise this is the last one...)
Now that you know what to use olive oil for and how to buy it, you should probably know how to store it. Fortunately, this step is much simpler than the other two. You don't want to heat it (per the First Fun Fact) so store it in a cool place. Also, Olive Oil is not like wine -- it does NOT get better with time. You want to buy as fresh as possible and use it up quickly. As such, avoid buying in bulk. Instead buy small, fresh quantities often.
These facts are all specific to Olive Oil. Terms vary per oils and even brands. Do some research of your own and learn all there is to know about oils and how to use them in the most nourishing and enjoyable ways!

This is one of my favorite ways to use olive oil. It's simple, delicious and goes with everything!
Rosemary Olive Oil
Olive Oil
Several Rosemary Sprigs
Glass jar with stopper or lid
- Place rosemary sprigs in glass jar (be sure to use a jar that is easy to pour).
- Pour olive oil into jar ensuring that it covers the entire length of the sprig.
- Close jar and let sit for a few hours.
- The longer the rosemary sits in the oil, the stronger the flavor.
I love to drizzle this on popcorn, vegetables, grains, potatoes... just about everything!! It's delicious!
xoxo,
Anne

Sources:
1. http://www.whfoods.com/genpage.php?tname=george&dbid=56
2. http://www.oliveoilsource.com/page/pest-weed-and-disease-control
3. http://www.lewisnaturalhealth.com/articles/general-articles/confused-about-cooking-oils-part-2
Sunday, November 3, 2013
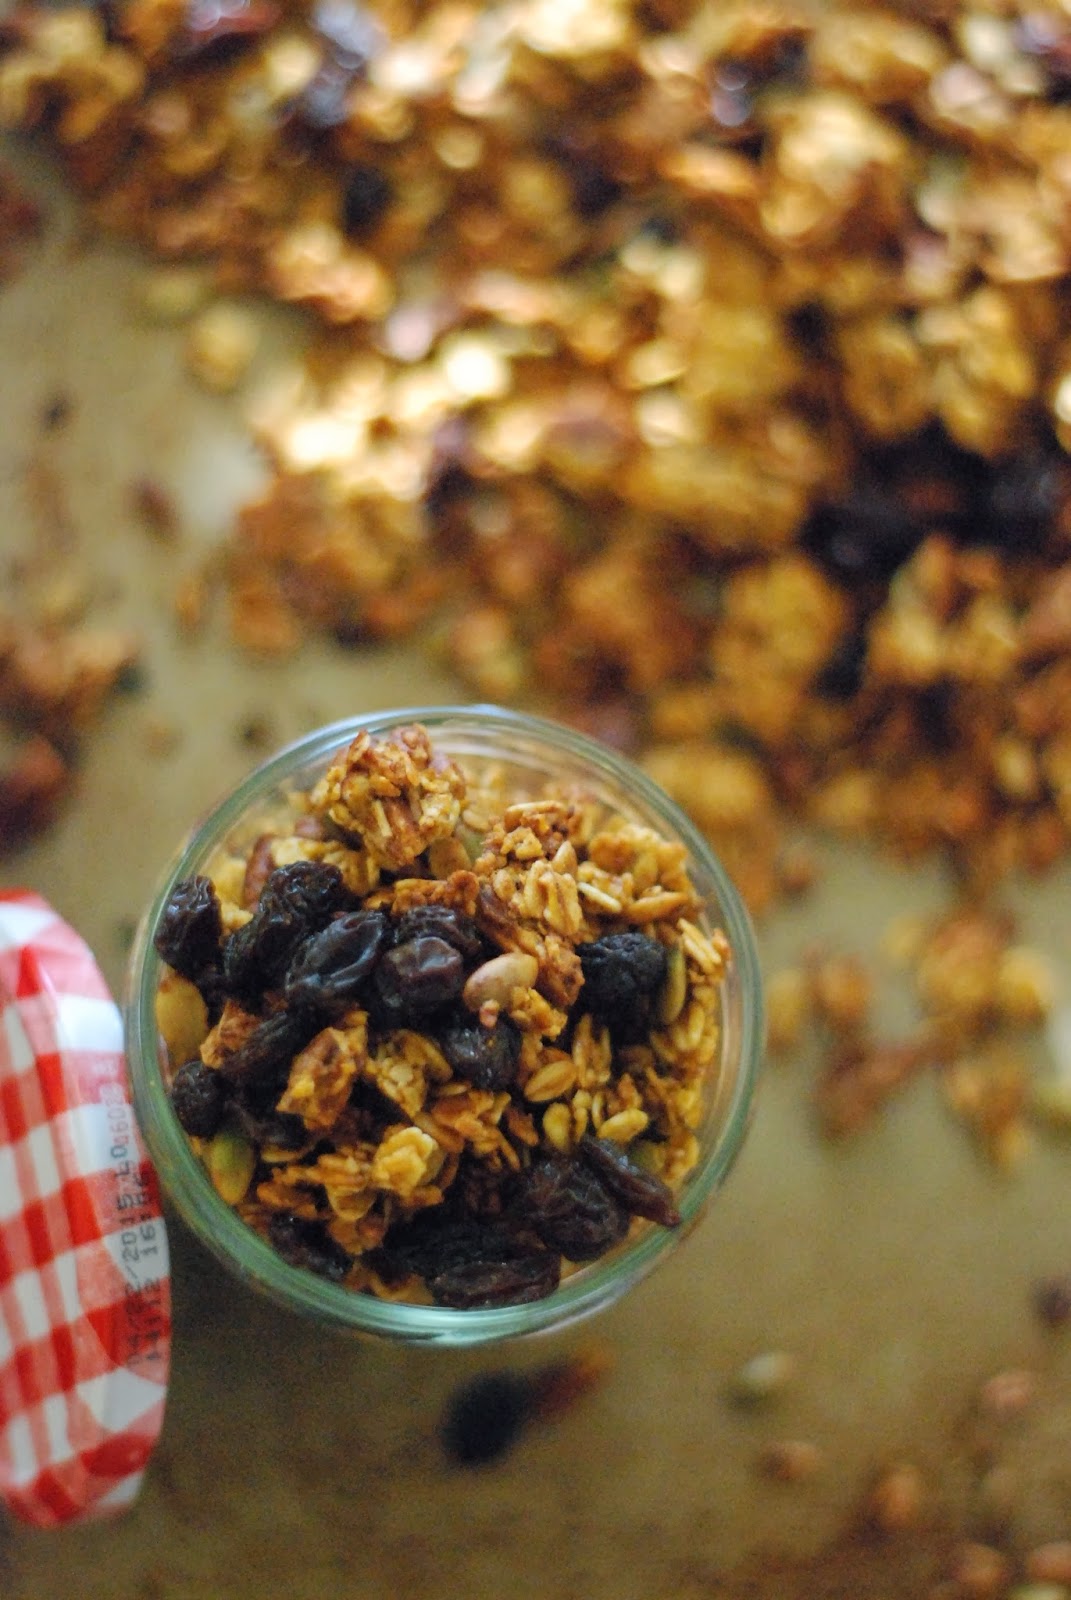
Morning Routines + Pumpkin Granola

[Enter the morning]
We all have our own routines, do we not? Mine is constantly evolving as I'm learning new healthy habits I want to incorporate into my daily life. Right now my day starts at 5:45 am. I try to do a few simple yoga poses and stretches for 15 minutes in the morning. That really helps to get my blood flowing and loosen up my stiff muscles. After that I like to freshen up. Washing my face with warm water, ending with a few splashes of cold and brushing my teeth. That does a wonder you know! I've started looking forward to it. It feels like the moment where I'm officially starting the day fresh (and clean!). Then I'll head into the kitchen, boil some water and start to read. My roommate and I are currently reading through Philippians via this book. We read the chapters from scripture out loud too. It's been amazing! I've loved the repetition and slow pace. The rest of the morning involves breakfast, oil pulling, using my neti pot, prepping myself with professional attire (sigh), drinking lots of water and maybe even some silly dancing to my favorite tunes. ; )
Now, I know that I breezed right past breakfast earlier, but don't let that fool you. Breakfast is a much anticipated event in my morning routine. Every night I secretly hope I wake up with nagging hunger pains and I am thoroughly disappointed on the mornings when that isn't the case. I try to keep a variety of items on hand for breakfast options and listen to my body to tell me what it needs. Some mornings it's eggs, avocado slices and greens. Other times it's a smoothie. Recently though? It's been this pumpkin granola. Usually granola is more of a spring and summer meal to me because the cold milk quenches my thirst. But this granola, ohhh this granola. It's sweet, crunchy, chewy, autumn-y and just enough pumpkin. The pecans and maple marry perfectly, the pumpkin puree causes the oats to clump and create a few clusters (which I happen to love in granola) and the vanilla and spices truly make it feel like you're eating Autumn in a bowl.
I hope you create some space in your morning routine for this Pumpkin Granola. I doubt you'll regret it.
Pumpkin Granola
Slightly adapted from Sprouted Kitchen
Makes about 3 cups
2 tablespoons coconut oil, melted
1/2 tsp sea salt
1tsp vanilla extract
3/4 tsp pumpkin pie spice
1/3 cup Maple Syrup
1/3 cup pumpkin puree
2 cups old fashion oats
1/2 cup raw pecans, roughly chopped
1/4 cup pumpkin seeds
l-2 large handfuls of crimson raisins
- Preheat the oven to 300.
- Mix first 6 ingredients into a mixing bowl.*
- Then add the nuts, seeds and oats.
- Mix well and spread out on the baking sheet and bake for around 35 minutes.
- During the process, check one or two times to be sure it's not browning too quickly and mix around with a spatula to ensure all sides get a good toasting.
- Once the granola feels dry enough and isn't too brown, remove from oven.
- While it's still warm, toss with the raisins.
- Cool completely and enjoy! I happen to love mine with nut milk.
Notes:
*Since using coconut oil, try to have all ingredients at room temperature so that it doesn't seize back up into a solid state.
My oven heats up and cooks quickly, so I listed a lower temperature and shorter cooking time. Adjust those details as needed for your oven.

Friday, October 18, 2013
Asian Portobello Burgers + Destiny.
Have you ever met someone who you think "we were destined to be friends"? I've been fortunate enough to think this about numerous people in my life. But looking back on one friendship in particular makes me laugh in amazement. I never saw it coming and quite honestly didn't realize it would turn out to be what it is! I had even known of this person for several years through mutual friends but hadn't pursued a friendship. Boy, am I glad that our paths collided in such a powerful way. This girl has rapidly become one of my most cherished friends and both of us instantly committed to a full-force & life-long friendship. BAM. Don't you just love when that happens? It was destiny.

We most recently met at work and immediately clicked. I don't even remember the stages before being super, fantastic, awesome friends (yes, I talk like a 12 year old)! We are extremely different people but have several key passions in common: food, travel, loyalty, health, faith, outdoors... I could go on! Our love for food was one of the first common factors we found and boy did we hone in on that one! We started doing weekly hang out sessions where we would cook dinner, drink wine, watch Friends and chat it up. It was glorious. This girl has the most infectious laughter and care free spirit. She helps you enjoy to the fullest whatever you are doing that moment. She encourages you to take heart in the moments you can't force yourself to enjoy and sits with you through the muck until you can jump the fence to the greener grass. She helps you to laugh with an open heart, to be brave, and to live not for yourself but for The Lord. She's pretty awesome. AND she must have magic powers because every time we cook together the food is phenomenal!
This past summer we made Portobello Burgers (my version, their version) and whoa! My taste buds didn't even know what to do! Ever since, portobello burgers have been at the forefront of my mind. I needed to have another. So this last time we got together, we made Sprouted Kitchen's Portobello Burgers. I'll be honest. Green Kitchen's burger was so delicious that I worried this burger wouldn't live up to the high standards. But not only did Sprouted Kitchen live up to these standards (who am I kidding, she always does!), she exceeded them. Although I cannot tell you which burger I loved more, I will say that both of these recipes will go down in my Recipe Successes Hall of Fame. For-eh-verrrrrrrrrr.
So without further adieu, I give you one of the most juicy, flavorful and easiest dinners yet: The Asian Portobello Burger. Make this and you'll see: You + This Burger = Destiny.


Asian Portobello Burger
Serves 2
Slightly adapted from Sprouted Kitchen
Marinade:
2 large portobello mushrooms
2 Tbsp organic low sodium soy sauce/tamari*
2 Tbsp maple syrup
1 Tbsp toasted sesame oil/ extra virgin olive oil
squeeze of lemon or lime
pinch of pepper
Toppings & Sauce:
1 -2 cups of shredded slaw (any kind)*
2 Tbsp tahini
1 tsp organic low sodium soy sauce/tamari*
2 tsp toasted sesame oil (or regular if you have it on hand)
2 Tbsp vinegar (I had white distilled on hand so I used that)
1 small bunch cilantro, roughly chopped
1 avocado
2 Ciabatta Rolls, sliced in half and toasted***
Directions:
Preheat stove top or grill to medium high heat.
Preheat oven to broil. Slice ciabatta rolls in half and prepare to toast them to delicious perfection.
Brush the dirt off the mushrooms and carefully remove the stem. Make the marinade (shallow bowls or a rounded plate work best here) and let the mushrooms soak for 5-10 minutes.
Make the slaw: whisk the sauce ingredients together and pour over slaw; toss well and set aside.
Once stove top or grill has reached the desired temperature, place the mushroom on the grill. I found that no other oil was necessary because the marinade keeps the mushroom from sticking. Grill for a few minutes on each side. You want nice grill marks and the shroom to be cooked all the way through.
While the mushrooms are cooking, prep your avocado. I like to smash mine and rub it on the toasted bread.
Roughly chop your cilantro.
Roughly chop your cilantro.
Assembly:
Toast your bread. Spread the avocado on. Place the portobello burger with the cavity side up. Fill the cavity with the slaw. Sprinkle with lots of cilantro and maybe an extra squeeze of lemon or lime for good measure. Place top bun on and DIG IN. My mouth just watered.
Notes:
*Sprouted Kitchen makes her own slaw, which I HIGHLY recommend. We actually were starving and running short on time so we got an undressed slaw that we found to be delicious. It met all of my standards and tasted great. So just know that, whichever you choose -- this burger is your destiny. It will be delicious.
**I always recommend organic but here I wanted to label it as such. Soy is one of those ingredients (like corn) that if it doesn't not specify organic, then it is probably Genetically Modified. You really want to steer clear of these types of "food" because the body cannot process it properly as it is not real food -- it was genetically modified.
***Usually I would suggest a whole grain, less processed type of bread. But here, I like to say that moderation in all things is the best mindset. Pick and choose where you want to occasionally enjoy a food that may not be beneficial to your body but is beneficial to your taste buds. For me, ciabatta is one of those times. There's nothing like a light and freshly toasted ciabatta roll. I think in this recipe it added a great deal of wonderful texture and flavor. However, if that's not something you care about -- then totally go for a grain that you feel would benefit and nourish your body! I always support that!!
Anne
Thursday, September 12, 2013
Dreamin' of Potatoes

So after I hit a wall today (maybe one of my more unproductive days) I came home and decided I would write down a list of dreams. I knew what some of them were already, but I wanted to be give myself freedom and be honest about what I truly wanted, why I wanted them and how I would obtain them. If you know me, you wouldn't be surprised to see that most of them are food, people and travel related. Some of them are possible and some of them might not be. But why would I sell myself short and not even try at the ones that seem impossible? I'm tired of giving up so easily and letting others be the ones to Do. Find. See. what they love. Why should I not go for it and embrace failures along with (hopeful) successes?
This brings me to this blog specifically. It's something I've dreamed of doing for years and (finally) worked up the courage to start. I want it to be a place of honesty. A place I can come to and share my thoughts, learnings, ideas and dreams. A place where I can be myself. Not stressing to say the right thing. Or presenting myself in a "perfect" way. Just a place where I can share what I'm passionate about and be real. (And hopefully make some friends along the way!)
So, here I go -- attempting to go after my dreams. It will take time, effort, research, patience and who knows what else. But I don't want to settle for someone else's dream - I want to live my own.

As you can see, this recipe is a somewhat familiar twist on the old potato salad. Now before you go running to the treadmill out of fright, give me a minute to stand up for potatoes. Long have been the days where I dream about potatoes and as soon as I finish someone debbie downers me with a statement like "Oh, but you know I really don't eat those because they're so bad for you!" Poor potatoes! They never stood a chance!
But I'm here today to point you in the other direction. I wouldn't say these tubers are super-foods (cause they're not) but they do have some great qualities about them! First off, these babies are chocked full of Phytochemicals and Vitamins! Phytochemicals are compounds made by plants that are great for preventing serious health conditions like cancer, heart disease, diabetes and high blood pressure. There's evidence that these bad boys fight off the formation of carcinogens and protect our cells by suppressing the development of cancer. In fact, Phenolic Acid (a type of Phytochemical) is so high in red potatoes that it rivals broccoli!
As for vitamins, potatoes are high in B6. This vitamin is essential to the the building and communicating of our cells. Which is of course extremely important in every system in our body!
So, I say we all give potatoes a second chance (unless of course you're allergic - then please don't!) and this is the perfect opportunity!
Green Bean and Colorful Potato Salad
Serves: An army*
Potato Salad:
1.5 lbs green beans
3 lbs small potatoes - blue, red and golden varieties
2 lbs cherry or grape tomatoes
1 large handful parsley, chopped
3-4whole lemons, juiced
1/4 cup olive oil (organic, expeller pressed if possible)
salt and peper to taste
Directions:
1. Boil potatoes until fork tender. Chill and then quarter them.**
2. Blanch green beans. Chill and then cut them into a size similar to potatoes.***
3. Halve tomatoes.
3. Chop parsley.
4. Cut lemons in half and squeeze all the juice.
5. Mix lemon, olive oil, salt and pepper to taste. (I prefer more lemon than oil but just measure as you
prefer!)
6. Mix all ingredients in a bowl except lemon dressing and parsley. Keep chilled until ready to serve.
7. When ready to serve, shake dressing well and pour over salad. Mix well.
8. Sprinkle chopped parsley over top and serve!
Notes:
*The great thing about this recipe is that it is completely flexible! You can add more or less of any
ingredient to fit your taste preferences. Love potatoes? Add more! Prefer cilantro? Sub it for
the parsley. Only feeding yourself? Just downsize on all the portions to fit one. You can tweak
this recipe as much as you like!
**Fork Tender = stabbing potato with fork and the potato slides right off. (Be sure to let them chill
completely before quartering or they will mush).
***Blanch = steam or boil for only 30 seconds -1 minute (so beans are still vibrant green) then throw
them straight into a big bowl of iced cold water. Let them chill completely and then chop.
****As always, I strongly suggest organic. This is because the less chemicals, hormones, pesticides,
herbicides, fungicides ETC you put in your body, the more capable it is to function properly! The
better it functions, the better it serves you!
What are your dreams? Are you living them out already? Still developing them? Let's hear it!
Whatever they are, I pray you have the courage to embark on your journey towards them....and enjoy the ride!
Here's to living out dreams,
Anne

References:
1.http://www.cancer.org/treatment/treatmentsandsideeffects/complementaryandalternativemedicine/herbsvitaminsandminerals/phytochemicals
2. http://www.whfoods.com/genpage.php?tname=foodspice&dbid=48
1.http://www.cancer.org/treatment/treatmentsandsideeffects/complementaryandalternativemedicine/herbsvitaminsandminerals/phytochemicals
2. http://www.whfoods.com/genpage.php?tname=foodspice&dbid=48
Tuesday, August 27, 2013
Smashed Avo Toast & Being Thankful
This summer has been an interesting one. It's been chocked full of so many different emotions that I can't even categorize them for you. I wish I had more time to revel in them and see them more clearly. I wish I could learn more deeply from them. Even so, life is flying past me at the moment and if I can learn anything at all from this array of emotions then I'll take it.
I have come to value learning in such an immense way. It's rewarding, life changing and encouraging. It's rewarding to know that I am not the same person I was a year ago today. And I won't be the same person next year today. It's exciting to be sure that God will grow me and change me in both the little and big ways throughout the next year of my life. It's encouraging to know that this responsibility of change doesn't fall on me. Instead as long as I look to the Lord and open my heart to His will, He will do the work and He will change me.

No, this isn't new to me. And yes, I realize almost everyone on the planet is obsessed with them. I also realize the simple "recipe" I'm going to share with you was so 2012. But I'm going to share it with you anyway. Why? Because it's so amazing it should be "so in" all the time. ; )
Smashed Avocado Toast:
Serves 1
1 piece bread, toasted
1/2 avocado, mashed
1 small tomato, sliced
salt and pepper
1. Toast bread
2. Mash avocado with fork
3. Slice tomato (optional)
To assemble: Spread smashed avocado on toast. Sprinkle with salt and pepper. Layer tomatoes on top and sprinkle with more salt and pepper. Optional: Chop and sprinkle lots of fresh herbs on top.
*To me the whole point of this "dish" is to taste the combination of salted avocado with toasty bread. Leave off the tomato if you want, it's still amazing. But be sure to use enough avocado and sprinkle that layer with salt. Mmmm.

Much love,
Anne
I have come to value learning in such an immense way. It's rewarding, life changing and encouraging. It's rewarding to know that I am not the same person I was a year ago today. And I won't be the same person next year today. It's exciting to be sure that God will grow me and change me in both the little and big ways throughout the next year of my life. It's encouraging to know that this responsibility of change doesn't fall on me. Instead as long as I look to the Lord and open my heart to His will, He will do the work and He will change me.

No, this isn't new to me. And yes, I realize almost everyone on the planet is obsessed with them. I also realize the simple "recipe" I'm going to share with you was so 2012. But I'm going to share it with you anyway. Why? Because it's so amazing it should be "so in" all the time. ; )
Smashed Avocado Toast:
Serves 1
1 piece bread, toasted
1/2 avocado, mashed
1 small tomato, sliced
salt and pepper
1. Toast bread
2. Mash avocado with fork
3. Slice tomato (optional)
To assemble: Spread smashed avocado on toast. Sprinkle with salt and pepper. Layer tomatoes on top and sprinkle with more salt and pepper. Optional: Chop and sprinkle lots of fresh herbs on top.
*To me the whole point of this "dish" is to taste the combination of salted avocado with toasty bread. Leave off the tomato if you want, it's still amazing. But be sure to use enough avocado and sprinkle that layer with salt. Mmmm.

Today I am thankful for change, thankful for emotions, thankful for growth and thankful for avocados. Cheers! Let's eat some Avo-toast. ; )
Are you guys as thankful for avocados as me? What else are you thankful for??
Much love,
Anne
Saturday, August 10, 2013
Facts about Fats: Ghee
Hey there!
So I've been wanting to do a post about oils/fats for a while now. There's so much information out there about what fats to use and how to use them so I'm hoping to narrow it down and shine some light on a few key fats that I love to use the most (cause I think they're great). There's nothing fancy here today -- just the basics for everyday eating.

The fats I use on a regular basis are Ghee, Coconut Oil and Expeller-Pressed Olive Oil (which I also flavor with herbs). There are of course other oils I would love to use, such as nut oils, avocado oil etc but when you're shopping on a budget those things usually get put back on the shelf. ; ) I'm keeping my eye open though for my golden opportunity to grab one of those fancy babes on sale.
But for now, let's talk about Ghee! I'll do other posts on Coconut Oil and Olive Oil soon.
Ghee: This tasty fat is pictured above. It's typically made from cow's milk and is the same thing as clarified butter (lobster anyone?!). Although cow's milk is not my first choice because it is harder on our digestive systems and contains lactose, I happen to love this golden brew. I love it because it has a high burning point, it's lactose free AND the taste is just so buttery, browned and deeeeelicious!
When you clarify butter you are separating the milk solids from the fat in the butter and evaporating the water content. The milk solids (where the lactose is) float to the top creating a white foamy layer. Usually this takes around 20-30 minutes of simmering on the stove. While the milk solids float to the top, the water evaporates and the fat just gets golden and more golden. OH MAN. I'm licking my lips thinking about it! So when the butter is ready you pour the liquid through a strainer or cheesecloth to catch the milk solids and what's left behind is Ghee! Yeay!
The separating of the milk solids is the essential step to making Ghee. It's important because it not only removes the lactose (which is hard on most everyone's digestion) but also allows the Ghee to have a higher burning /smoke point. This is important for everyone, lactose intolerant or not. : ) See, when a fat reaches it's burning point it starts to turn into a gas and let off free radicals. Free radicals are extremely harmful to the body. They are actually molecules that are unevenly paired. In order to even up and stabilize, they attack other molecules in the body. They seek to take electrons from other molecules to stabilize, but unfortunately all that does is cause a domino affect. When free radicals take from stable molecules, they leave the victim molecule unstable and therefore a free radical. Obviously, this sounds dangerous and rightly so. Free radicals have been linked to various diseases such as diabetes, heart disease and cancer. Yowza.
So, the higher the burning point the lesser the chance of the fat turning into gas and letting off free radicals. When you remove the milk solids, the burning point goes up considerably. Butter has a burning point of about 300-350 degrees. Clarified Butter/Ghee has one of 375-485 degrees. See the difference? Yeah. Let's go make some Ghee!
Ghee or Clarified Butter
4 sticks of butter*
*I like to make a big batch at once, but you could of course just use 1 stick and go from there.
Anne
Sources:
1. http://www.healthchecksystems.com/antioxid.htm
2. http://whatscookingamerica.net/Information/CookingOilTypes.htm
3. My kitchen. ; )
So I've been wanting to do a post about oils/fats for a while now. There's so much information out there about what fats to use and how to use them so I'm hoping to narrow it down and shine some light on a few key fats that I love to use the most (cause I think they're great). There's nothing fancy here today -- just the basics for everyday eating.

The fats I use on a regular basis are Ghee, Coconut Oil and Expeller-Pressed Olive Oil (which I also flavor with herbs). There are of course other oils I would love to use, such as nut oils, avocado oil etc but when you're shopping on a budget those things usually get put back on the shelf. ; ) I'm keeping my eye open though for my golden opportunity to grab one of those fancy babes on sale.
But for now, let's talk about Ghee! I'll do other posts on Coconut Oil and Olive Oil soon.
Ghee: This tasty fat is pictured above. It's typically made from cow's milk and is the same thing as clarified butter (lobster anyone?!). Although cow's milk is not my first choice because it is harder on our digestive systems and contains lactose, I happen to love this golden brew. I love it because it has a high burning point, it's lactose free AND the taste is just so buttery, browned and deeeeelicious!
When you clarify butter you are separating the milk solids from the fat in the butter and evaporating the water content. The milk solids (where the lactose is) float to the top creating a white foamy layer. Usually this takes around 20-30 minutes of simmering on the stove. While the milk solids float to the top, the water evaporates and the fat just gets golden and more golden. OH MAN. I'm licking my lips thinking about it! So when the butter is ready you pour the liquid through a strainer or cheesecloth to catch the milk solids and what's left behind is Ghee! Yeay!
The separating of the milk solids is the essential step to making Ghee. It's important because it not only removes the lactose (which is hard on most everyone's digestion) but also allows the Ghee to have a higher burning /smoke point. This is important for everyone, lactose intolerant or not. : ) See, when a fat reaches it's burning point it starts to turn into a gas and let off free radicals. Free radicals are extremely harmful to the body. They are actually molecules that are unevenly paired. In order to even up and stabilize, they attack other molecules in the body. They seek to take electrons from other molecules to stabilize, but unfortunately all that does is cause a domino affect. When free radicals take from stable molecules, they leave the victim molecule unstable and therefore a free radical. Obviously, this sounds dangerous and rightly so. Free radicals have been linked to various diseases such as diabetes, heart disease and cancer. Yowza.
So, the higher the burning point the lesser the chance of the fat turning into gas and letting off free radicals. When you remove the milk solids, the burning point goes up considerably. Butter has a burning point of about 300-350 degrees. Clarified Butter/Ghee has one of 375-485 degrees. See the difference? Yeah. Let's go make some Ghee!
Ghee or Clarified Butter
4 sticks of butter*
- Place all four sticks of butter in a big enough pot on the stove.
- Turn heat on low.
- Simmer for 20-30 minutes until golden brown and all milk solids are floating on the top.
- Pour butter through mesh sieve, cheese cloth, or scoop out milk solids.
- Let cool completely.
- Keep on counter in glass jar or in fridge. Fridge will last much longer.
*I like to make a big batch at once, but you could of course just use 1 stick and go from there.
Enjoy it as would you butter but without any free radicals or lactose. YUM!
Anne
Sources:
1. http://www.healthchecksystems.com/antioxid.htm
2. http://whatscookingamerica.net/Information/CookingOilTypes.htm
3. My kitchen. ; )
Saturday, July 27, 2013
The Star of Summer.
Oh, the tomato.

I wait all year for the sweet crunch of the grape and cherry tomatoe and the soft juicy flesh of any heirloom. I put them on everything. Open faced tomato sandwich (with or without bacon but always with basil), any sort of vegetable or grain salad, and my favorite way to eat them... Tomato Pie.
Tomato Pie is a family dish that I have treasured (yes, treasured) my entire life. It is maybe one of my top 5 favorite dishes in the world. And yes, I realize that is a bold statement. I say it with confidence, sincerity and no desire to take it back. So there. ; )
This tomato pie is so amazing that I must implore you to make it now. Make it today, make it again tomorrow and keep making it until the last tomato is gone for the summer. You won't regret it. Although it is heavy on the cheese so your stomach might. In fact, I am currently attempting to revamp this recipe to make it much healthier with no cow's milk and NO mayo (unless homemade). These are baby steps here and so far, so good. We'll see what version I make next and if it's even better I'll let you know. : )


A few things you should know before we get to the recipe:
1) Fresh tomatoes are necessary. Fresh from the closet garden you can find. As crazy as it sounds, store bought tomatoes just don't do this dish justice. You can definitely tell a difference between a store bought and garden fresh tomato. Go with the garden - it's better tasting, better for you, and better for the environment. : )
2) I hate to say it but, this dish has mayo. I am a strong loather of mayo. I've hated mayo since I was born and I'll hate it til I die. However, I am interested in making my own and would be completely comfortable using that as the mayo replacement. For both health and personal reasons (such as disgust). However, I'd be curious to see how the thinner consistency would manage. If you attempt it before me, let me know how it goes!
3) I made a whole spelt flour crust, but you could use a store bought crust if you prefer. Alternatively, if you are gluten free you could always make a nut flour crust. Hopefully I'll have a recipe for you soon but for now look up Roost Blog for hers.
4) This dish currently contains cow's milk cheese (albeit lactose free -- which is why I am able to eat it). I would like to attempt making it with only goat or sheep's milk cheese. That would alter the overall taste of the tomato pie, but I think it could be for the better. I used a small portion of goat cheese in this dish but next time I'll go all the way. I prefer (and encourage you to try) using goat or sheep's milk instead of cow because it is much easier to digest for everyone. Even people who can handle lactose.

Goat's milk is a wonderful substitute for cow's milk for several other reasons as well. In addition to being easier to digest, goat's milk is also more nutritious. It contains more Calcium and Vitamin A (among other nutrients) than cow's milk and it helps to alkalize the blood stream. This is important because it helps balance out the PH levels in the body...which I am learning how important that is. More to come on all of these topics but for now let's all head over to My New Roots to discover more about the health benefits of goat's milk. Once I'm more learned on the subject I'll be back with another delicious and informative post! : )

Tomato Pie
Serves 6-8
Spelt Flour Crust
Slightly adapted from Smitten Kitchen
Makes 6-7 small ramekins or 2 rolls of pie dough.
2 1/4 cups spelt flour
1 tbsp baking powder (aluminum free)
3/4 tsp salt
3/4 tsp baking soda
9 tbsp ghee
3/4 cup buttermilk*
1) Mix dry ingredients in a food processor.
2) Add cold and cubed Ghee to food processor.
3) Add buttermilk and pulse until dough forms.
4) Wrap and chill for 2 hours.
5) Once finished chilling, bake at 375 for 10 min.
Tomato Pie
5-6 large tomatoes
large handful fresh basil
garlic salt
pepper
1 1/2 cups freshly grated cheese (I used a cheddar and goat mixture)
3/4 cup mayo
several jalapeños
1) Slice tomatoes and let them drain for 30 min. Sprinkle the garlic salt and pepper on sliced tomatoes
as the salt helps to drain the tomatoes even more. This will keep the crust from getting as soggy
during cooking process.
2) Shred cheese. Chop jalapeños. Mix cheese, mayo, jalapeños and lots of pepper until well
combined.**
3) Layer tomatoes in cooked pie crust and sprinkle basil between each layer.
4) Spread cheese mixture all over the top.
5) Bake at 350 for 35-45 minutes or until golden brown and bubbly.
*I make my own buttermilk by measuring the amount of necessary goat milk just shy of 1 tablespoon. Then add either lemon juice or white vinegar to reach the required amount and let sit for 5 minutes.
**I usually start with this amount and adjust as necessary. I prefer as little mayo as possible so usually add more cheese, but mix to your preference.

This dish is amazing with a glass of lightly sweetened tea and a light salad on the side.
Enjoy!
Anne
Sunday, June 30, 2013
Leek and Goat Cheese Quiche with Sprouted Spelt Crust
Spring cleaning is one of the best feelings to me. I feel lighter, more free, and funny enough more grateful for the belongings I decide to keep. I wish I had time to spring clean every month. Even just writing that down inspires me to have a 2013 Monthly Spring Cleaning Goal. Ahhh, it just sounds clean.
I have (clearly) been on this kick for some time now and it doesn't look like it's going anywhere. I have wanted to clear out items in our apartment "storage" room, items in my bedroom and especially items in the kitchen. I get antsy when I've had the same jar of grains sitting in my pantry for more than a few months. Or that jar of marinara sauce I regret buying. Especially the raisins that weren't organic but I bought them anyway. I am dying to use all these items up and buy what I really want next time. And a smaller quantity. I'm not sure where I got into a rut of buying more than I need. In regards to food, home supplies, clothes -- everything! I want to live more simply. Less stuff, better quality if possible and to just enjoy simple things. Get what I need and let it be.
When I think of food and spring cleaning the first thing that comes to mind is quiche. It's the perfect vessel for all leftover items -- vegetables, cheeses, grains, meats, etc! I made this within the last month or so and it turned out to be the prettiest, easiest and maybe the best quiche I've made to date. I think I've finally perfected the proportions and am pleasantly surprised by how few eggs I have to use. As much as I love quiche, I tend to hoard my eggs. I hate the idea of dumping all of my eggs into one dish for the week! So here we are. I hope you enjoy this as much as I did. Remember, switch out the ingredients for whatever you have on hand! You can add lots of extra ingredients or just keep it to a few like this one. You can use a store bought crust or make your own... the possibilities are endless!


Sprouted Spelt Flour Crust
Makes two pie crusts
Adapted from Smitten Kitchen Cookbook
21/2 cups organic sprouted spelt flour
1 teaspoon salt
12 tablespoons organic ghee (or butter), very cold
1/4 cup ice cold water
Using the dough blade for a food processor, combine flour and salt in the food processor and pulse to combine. Dice the cold Ghee and sprinkle into the flour mixture. Pulse to combine. Gradually add cold water one tablespoon at a time. Blend until mixtures starts to get crumbly and stick together.
Knead the dough a few times and then form it into ball and let chill in the fridge for at least 1 hour. Halve the dough and freeze the rest for later. Once ready, roll out the dough into a large round. Be sure to flour the counter and rolling pin to prevent sticking.
Press dough into pie dish and bake at 350 for 10-15 min until lightly browned.
Leek and Goat Cheese Quiche
Serves 6-8
Adapted from Eat Live Run
2 Leeks, halved and outer layers discarded
Goat Cheese, a few ounces
1 Red bell pepper
2 Large eggs
Milk, 1 1/4 cup
Salt and pepper to taste
Fresh herbs (or dried)
Knob of Ghee
Saute leeks in Ghee until soft. Slice pepper into thin slivers. Beat eggs and milk, season with salt and pepper. Chop the fresh herbs.
Spread leeks onto the baked crust. Layer the red pepper strips. Sprinkle fresh or dried herbs. Crumble small chunks of goat cheese. Pour egg and milk mixture on top and sprinkle another layer of goat cheese if necessary.
Bake in the bottom of an oven at 350 for an hour or until set. Cover with foil if browning too much.
This is great with a simple side salad or over a bed of microgreens. Eat and Enjoy!

Saturday, June 1, 2013
Almond Cake with Strawberries.

Well hello! I am all back from vacation and in the groove of normal life. (Yes, that's me you hear weeping...).
Vacation was wonderful. I had an entire week chocked full of time with my (best in the world) family, 3 hour naps, walks on the beach, reading great books, eating awesome food, and just good ole down time. It was one of the best vacations ever. Exactly what I needed and in much abundance. The Lord provided me with a cleared and peaceful perspective on several areas of my life and I came back feeling refreshed and more like my normal self than I've felt in quite a while. Everything about it was great and I'm so thankful I was able to do that. : )
Now to just keep that perspective and peace in the groove of "regular" life. That's the tricky part. Thank goodness the Lord gives abundantly to those who ask. : )
Well, now that vacation is over and work is in full gear -- Oh, yep. That's me weeping again -- I am trying to figure out how to keep blogging and eating (and working... and paying bills) with the change of seasons and change of my body's energy needs. Whenever it gets warmer, my body gets SUPER sensitive to foods. I can't eat much meat, my portion size decreases like crazy, I get nauseated every time I step outside (thank goodness for electrolytes!), and I RARELY want to turn on the stove. No, instead please just feed me smoothies and very cold water.
Since the weather hasn't gotten this bad yet, I figured I would make one last hurrah(!) cake before the oven becomes my enemy and the stove is Satan in disguise. Also, since strawberry season is coming to a close I thought it would be best to send off the spring season and say goodbye to the beautiful strawberry all at once. THIS beautiful cake did the trick.

My friend Sarah is a photographer. She is so kind, that she let me borrow a (legit) camera to shoot my photos for this post. She is teaching me a few things here and there and I can already tell a difference as previously I've been using my iPhone (I'm sure you can tell... wah waaaaah.) But I definitely have alot to learn. This is just the begining and hopefully my pictures will improve!


Anyway, enjoy the pics and make this cake. It's fabulous. The almond flour gives it a denser and nuttier flavor but the coconut whipped cream and strawberries give it an airy effect. The combination of all three is just fantastic.

I got the recipe from The Sprouted Kitchen cookbook. It is without a doubt one of my favorite books and has the most beautiful photography. If you don't already have it then you need to fix that ASAP. Trust me, you won't regret it.
Almond Cake with Strawberries
Slightly adapted from The Sprouted Kitchen
Coconut Whipped Cream from MyNewRoots
Serves 8 -10
Almond Cake:
3 flax eggs
1 tsp vanilla
1/4 cup greek yogurt
1/3 cup honey
3 tablespoons ghee or coconut oil
2 cups almond meal
1/2 cup sprouted spelt flour
1/4 cup muscovado sugar
1/4 tsp almond extract*
1 tsp baking soda
1/2 tsp aluminum free baking powder
1/4 tsp sea salt
- Preheat oven to 325 and grease a 9-inch round cake pan. Line with parchment.
- In a bowl mix flax eggs, honey, yogurt, almond and vanilla extract and coconut oil/ghee.
- In another bowl, sift the flour, almond meal, sugar, baking soda, baking powder and salt.
- Mix the wet ingredients into the dry and pour batter into the greased and lined pan.
- Bake for 20-25 minutes until done. (I love the toothpick test).
- Let cool completely.
Coconut Whipped Cream:
1 can Coconut Cream (or 3 cans coconut milk, fat separated from the water)
1/4 cup whipped honey
1 vanilla bean or 1 tsp vanilla extract OR 1/4 tsp almond extract
- Chill coconut cream (or milk) in the fridge to solidify. If using milk, let it solidify and separate the fat from the water. Use the fat, save the water for other dishes and/or smoothies.
- Once chilled, whip coconut fat with honey and vanilla.
- Let whip cream sit in fridge for 30 minutes.
To garnish:
Sliced strawberries (let sit in their own juices for a bit at room temperature)
Sliced almonds, toasted
To assemble:
Place the cake on a cake stand and center it. The cake is delicate so be careful. Top with the chilled coconut whipped cream, leaving a border of the cake showing. Spoon the strawberries onto the coconut cream, towering them a little in the center. Then sprinkle with the toasted almonds. Serve.
*Sprouted Kitchen used 1/2 tsp ground nutmeg and gave the cake a gingerbread affect. This was fabulous! However, in the spring I think almond extract would be perfect here!
This is fantastic with some spicy hot tea.
Hope you enjoy!
Anne

Sunday, May 12, 2013
Hello Vacation!

Hey friends!
I am happy to say I'm jetting (and by that, I really mean driving) off to the beach for a week with my family (7 WHOLE DAYS!!!!!!!!!!!!!!). Needless to say, I've been swamped preparing for said vacation (and for leaving work behind) and am only stopping in to say that as much as I want to post a delicious, wholesome recipe for you -- I just don't have time. BUT I do want to share a few of my favorite blogs with you to peruse while I'm gone. (As if anyone is really going to look at my blog between now and when I return...but still, I'm being positive here and assuming it's possible). ; )
These below blogs are a wealth of knowledge on all things wholesome, fun and delicious. For the inside of you and the outside! I am so looking forward to researching new topics of interest for me at the beach. These below blogs cover all of my old and new interests! I hope you enjoy them as much as I do!
Thank Your Body
My New Roots (an old fave with new info! Well new to me!)
Green Kitchen Stores (ah, their new cookbook is out of this world.)
Recipes I am dying to make. You should make them and send me a piece. ; )
Tropical Granola Bars
Strawberry Cake -- a great way to use strawberries!
Spring Potstickers - mouth is watering.
Rhubarb Floats - I have never cooked with Rhubarb (!?!)
Strawberry & Rhubarb Fro Yo
Strawberry and Leek Quesadilla - DYING to make these.
If you need a pick me up visit this wonderful, lighthearted blog. It's my favorite place to take a breather, laugh a little and enjoy someone else's enthusiasm for the simple things. This girl is the best. : )
Have a great week!!!!!!!
Love,
Anne
Sunday, April 28, 2013
Oatmeal Cookie Bars & A Bachelorette Weekend

This weekend was my roommate's bachelorette trip (Wooo!). Just a few of her closest girlfriends, down at the beach for the whole weekend. We packed plenty of snacks, games, and movies and simply relaxed the entire weekend. We grazed, laid out (well I laid in the shade) and slept all weekend. It was perfect.
The only thing missing from this weekend were these amazing Chocolate Chip Oatmeal Cookie Bars. They would have been perfect for breakfast (with Almond Milk), or as a snack by themselves, or even for dessert with vanilla ice cream on top. And the best part? All of those ways would have been super healthy!!! (Well, so -so on the ice cream, but moderation in all things right??).


Anyway, I made these a few weeks ago based off of the Peanut Butter Granola Bar from a fave blog of mine heedthefeed. I ended up tweaking almost everything in the recipe (as usual) to fit what I have in my pantry and/or my taste buds and somehow ended up with a cookie bar instead of a granola bar. (Hey, who's complaining??).
What's funny -- I actually didn't like them at first. They tasted too banana-y. (Is that a word?). But they grew on me REAL fast. They were so delicious (and nutritious) and I even got the stamp of approval from a few co-workers.
I am dying to make these again and eat them with ice cream. Or maybe even make them into Double Chocolate Oat Bars by adding cocoa powder....!?! and of course still with the ice cream. (duh).
I also want to try them without the extra liquid (see ingredients) to see if I can make them more granola bar-ish as well. If I can make two different (healthy!) snacks/desserts out of one set of ingredients...sign me up!!


Chocolate Chip Oatmeal Cookie Bars
Adapted from heedthefeed
I have only listed my recipe (as tweaked) but see Jessa's blog for the original recipe.
4 tablespoons melted coconut oil
1/2 cup natural peanut butter (I made my own by throwing peanuts, oil and salt in a food processor)
1/3 cup brown rice syrup (honey would work great too)
1/3 cup banana puree (thaw a frozen banana and puree in food processor until liquid)
2 cups oats
1 cup chocolate chips (or more... I seem to be heavy handed when it comes to chocolate.)
1/2 cup shredded coconut
1. Preheat oven to 350.
2. Spray an 8x8 pan and line with parchment paper (spray that as well).
3. Pour all ingredients into a bowl and mix well.
4. Pour mixture into prepared and lined pan and press firmly into the pan.
5. Bake for 20 minutes or until golden brown.
6. Let cool -- they are crumbly.

Serve warm or cold as a healthy breakfast, snack or dessert and enjoy! : )
Anne
Wednesday, April 17, 2013
La-La-La Liebster!

Hip Hip Hooray!!!
My sweet friend Sarah nominated me for the Liebster Blog Award!
An award? For me?? ...Does it count? I mean, Sarah is really sweet and always gives WAY more support than is deserved. So I questioned it... But I think it does count!
And here's why: The Liebster award is for bloggers who have 200 or less followers. I have 3.
.... are you laughing at me?
Well, go ahead! (Join me.) Cause it's funny. And true. Hah.
But what I love about this award is how sweet it is! The award winner is named the sweetest, kindest, nearest, dearest, beloved, lovely, kind, pleasant, valued, cute, endearing and welcome blog. Those are some wonderful words right there. And I will gladly (and undeservedly) take any of them. :)
As a Liebster nominee, I am required to:
1. Post 11 things about myself.
2. Answer questions from my nominator.
3. Choose 11 other bloggers, link them to this post and create 11 questions for them.
4. Go to their blog and tell them.
So without further adieu, here are the new bloggers I want to nominate!
1. Heather at Sunday Morning Banana Pancakes (has a few more than 200)
2. Emily over at Send Me On My Way
3. Tanya at Leafy Greens and Me
4. Courtney at The-Life Traveler
6. Colin and Rachel at Colin Kai Rachel
7. Corrie at Hey Corrie Tell Me a Story
8. Katie and Oliver over at The Thompson Family
9. Jessica at Blog Sweet Blog
10. Mandy at Simplicity and Reality
11. Katie at As We Go
Here are your questions:
1. Favorite drink?
2. Biggest cooking/baking failure?
3. Why did you start a blog?
4. Current favorite blog?
5. If you could live anywhere?
6. Do you prefer cooking or baking?
7. Night Owl or Early bird?
8. Where do you sing the loudest?
9. What is your favorite type of movie and WHY?
10. Current song you are obsessed with and WHY?
11. Aragorn or Legolas? ; )
The questions from MY nominator:
- if you could instantly learn a language, what would you pick/why? Elvish. Cause I'm a nerd.
- if you were a witch/wizard from Harry potter what would your patronus be? A baby bear. Because it's my favorite animal, because baby is more feminine (ha) and because when it comes to protecting (mainly others) I think I would be fierce -- no playing around. Also, I wouldn't consider myself stealth or sneaky and I don't consider bears to be those either. :)
- that song that you sing to really loudly in the car. Right now? Heartlines by Florence and the Machine, Cold is the Night by the Oh Hello's, and Young Blood by the Naked and the Famous.
- If you were allowed to choose what you were going to look like at the time of your birth, what would you pick out: Well I used to say tall, dark skin, dark hair etc but now I think I would say just a few inches taller, longer /leaner limbs, still fair skin, with TRUE strawberry blonde hair (more on the strawberry side) and I'd keep my brown eyes. But I'd have naturally dark eyelashes with no dark circles under my eyes. ;)
- Does your head or heart lead you in decision making? Usually my heart but the past few years have morphed me into hearing my head speak. I still have to CHOOSE to follow my head but at least I can hear it now.
- the most courageous dare you’ve ever taken or told someone else to do. Courageous? Sounds valiant and I have done no such dare. But one time I did dare my friend to lick the inside of my dog's kennel.
- What is a small silly personal goal you are proud to have accomplished? That I get up everyday and go to work. It's a normal thing that people do everyday but it goes against every fiber in my being to go sit at a desk all day. But I'm proud of myself for doing it even though I don't want to and supporting myself as a result.
- The most confusing instructions you were ever given? Any driving directions my mother tries to give me. (love you mom). : )
- what was your most prized childhood toy? My stuffed animal Bear bear. Or my beanie baby - Nuts (the squirrel). What can I say? I'm relational. ; )
- The worst job/occupation you’ve ever done? I've actually had some pretty good jobs. But one catering job I had was so hard my body ached for days after. And, every time I took dirty dishes to the kitchen the smell made me want to barf. I came pretty close to doing so after the 597th time I walked by.
- What is a style / way of dressing that you secretly appreciate but most people would be surprised if you actually wore it. Early 1900s (before the 20s). I'm pretty sure I'd get some looks. Also, I absolutely love the feel of outdoors-y wear but get comments when I wear it. Apparently I seem to girly to be sporting gear?
- Poof, you have suddenly been bequeathed a hidden talent, and it is: Painting or Carpentry or playing the piano (esp this). I feel like those would be such wonderful stress relievers, means of expression and hobbies.
11 details about me and my life:
1. Baking is one of my favorite ways to relieve stress.
2. My all time favorite vacation was to the Harry Potter Theme Park when I was 23. (nerdy?)
3. I have no shame in belting it out in the car. Or in the shower.
4. My last boyfriend was in 8th grade. (Can I help it if only old men are attracted to me??)
5. I have a strange obsession with Giada De Laurentiis. Why I need every cookbook of hers is
unknown to me.
6. I sometimes run from the bathroom and jump into my bed...so the creepy monster under the bed won't get me, duh.
7. I can't hold in tears. My heart gets tugged at the slightest of events too. Not a good combo.
8. I tend to be overly loyal. If I believe in something or love someone I will fight for it (or them)
until the end. I wish this was a romantic & sweet characteristic about me... but normally it
just ends up kicking me in the rear-end.
9. I hate mayo, walmart and roaches more than most things.
10. My first day in my college Mountain Biking class, I rode out with two (gorgeous) guys and my
instructor. Instead of successfully jumping the curb like the other guys, I hit it and fell over on
the pavement. #thisismylife
11. God loved me first. Therefore I love Him. By His grace alone, I have eternal life in Him.
Subscribe to:
Posts (Atom)